You must be looking for a solution to ntoskrnl.exe in Windows 10’s high CPU usage.
This error may be caused by viruses, 100% usage of the disc, or outdated drivers.
Ntoskrnl.exe stands for the Windows NT operating system kernel executable. It provides the executive and kernel layers of Microsoft Windows NT kernel space.
This network provides services for hardware abstraction and other systems.
This article will provide you with solutions to the high memory usage in Windows 10.
Table of Contents
How to Fix Ntoskrnl.exe High CPU Usage?
Follow the solutions in order and see if your problem is resolved. Let’s get started.
Solution 1: Disable Superfetch Service
ntoskrnl.exe High memory usage can be fixed by disabling superfetch. Follow the steps to disable it.
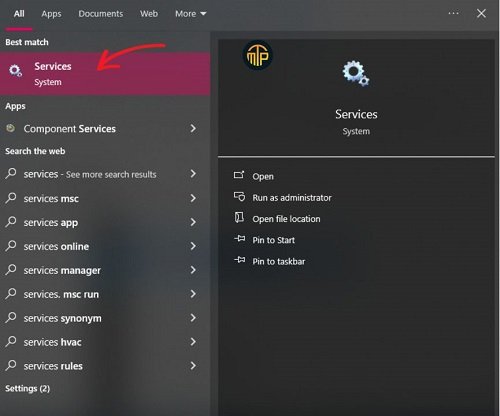
Press the Windows key.
Enter services by typing service.
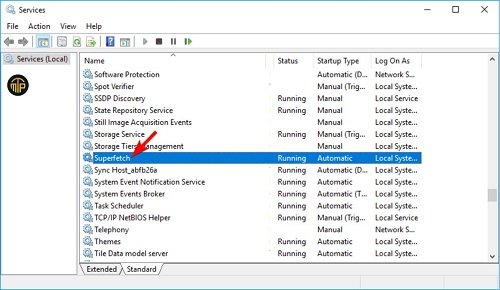
A list of services will be displayed in the service window.
Double-click on the property to open it.
Select Startup and disable it in the Properties window.
Click the stop button to stop service.
Click on the Apply and then Ok buttons to save your changes.
The superfetch service will be disabled after you have completed the steps above. This will fix your Windows 10 system CPU usage problem.
In case superfetch doesn’t work, you can disable some other services. Services such as Windows Search, Remote Desktop Services, UserMode port redirector, TCP/IP NetBIOS helper, Offline Files Services, and Remote Desktop Services.
You can get rid of high CPU usage by disabling these services.
Solution 2: Update Drivers
Ntoskrnl.exe can cause high CPU usage due to outdated or corrupted drivers. It is recommended to update drivers in order to fix Windows 10 memory usage.
You can update drivers manually or automatically. To do this, open the Device Manager, search for the outdated driver, and update it.
Solution 3: Create a Registry File and Execute it
You can fix Windows 10 by creating a registry and then executing it.
Create a registry by following the instructions below:
The registry will be automatically modified once the file has been executed. Now you can check if the ntoskrnl.exe issue with high CPU and disc use has been resolved or not.
Solution 4: Uninstall the Apps
You don’t have to remove all program or apps from your computer when you uninstall them. Uninstall any apps or program you don’t use and that take up space on your PC.
Windows 10 high memory usage can be solved by uninstalling apps.
To manually uninstall apps, go to Settings>Apps. Click on the app you no longer need, then click the uninstall button.
Solution 5: Stop the BlueStacks Services
Bluestacks can cause system CPU usage. To fix this problem, you will need to create a batch file that stops the Bluestacks service.
Here are the steps to follow:
Notepad Copy the lines below.
“C:Program Files (x86)BlueStacksHD-Quit.exe”
net stop BstHdUpdaterSvc
net stop BstHdLogRotatorSvc
net stop BstHdAndroidSvc
Select Save the file by clicking on File.
Select all files.
Save the file in the desired location as script.bat.
Run the script. bat by going to its location.
The high memory usage problem will be resolved once the Bluestacks service is stopped.
The solutions listed above can help you resolve the Ntoskrnl.exe Windows 10 problem. Try them all one by one, and you will see which one suits the problem.
Once the memory problem has been resolved, run the recommended software to scan your computer for errors.
This article is expected to help you solve your PC problem.
![How To Fix Ntoskrnl.Exe High CPU Usage Windows 10? [100% SOLVED]](https://mytenproducts.store/wp-content/uploads/2024/05/1-10.jpg)


![DNS Server Not Responding Error on Windows 8? [Fixed 2024]](https://mytenproducts.store/wp-content/uploads/2024/05/1-13.jpg "DNS Server Not Responding Error on Windows 8? [Fixed 2024]")


 2024")
")


1 thought on “How To Fix Ntoskrnl.Exe High CPU Usage Windows 10?”